Scheduling API Tests
You can schedule tests to run as often as you’d like, with granular control as to when tests run. Let’s take a look at how it works.
What You'll Need
- A Sauce Labs account (Log in or sign up for a free trial license).
- An existing, published API Test. For details on how to create one, see the Quickstart.
The Schedule functionality is available only for published tests. For more information, see Publish Your Test.
Scheduling Tests
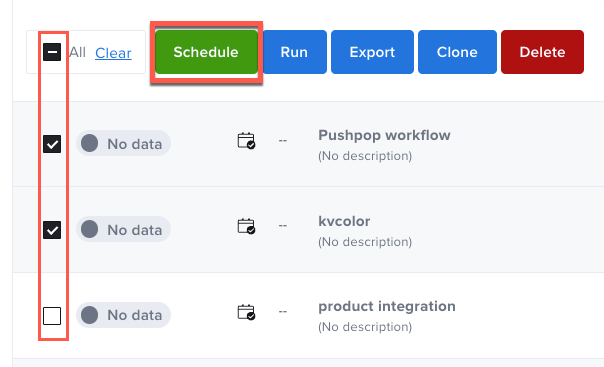
- On the Tests page, click the checkbox next to one or more tests that you want to schedule, or click the All checkbox, and then click Schedule.
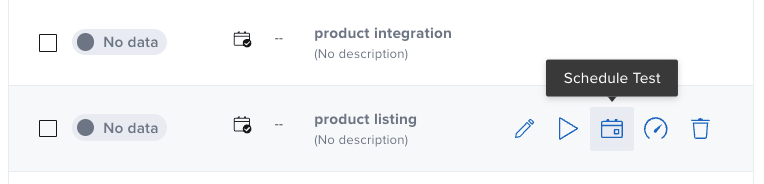
As a shortcut to schedule a single test, hover over the test, and then click the Calendar icon to open the scheduler directly.
- In the New Schedule window, enter a Schedule Name (Description is optional).
- Optionally, you can click a checkbox next to one or more tests to add or remove tests from the schedule.
- Choose a Time Zone, but verify that you're using the right one. For example, if you're in Berlin and want to run at your local time, make sure to select
Europe/Berlininstead ofAmerica/Los Angeles. - Use the Minute, Hour, Day, and Month parameters to schedule the frequency at which you'd like your test to run. It will repeat at your configured time and interval.
- Optionally, you can add a Sauce Connect Proxy tunnel by selecting one from the No tunnel dropdown or entering a
key=valuevariable override.
When an override variable is declared, its value will be injected into the test when it’s executed. If the variable has already been declared in the Vault or the Globals/Input set, it will be rewritten with the new value.
- When you're finished, click Save. The test schedule is displayed on the Schedules page.
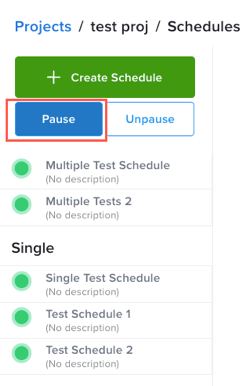
Test Schedule Options
Hover your mouse over the schedule name to access the Pause, Edit, and Delete options for a schedule.
To pause all test schedules in the same group (Single or Global), click Pause.