Create Scheduled Reports
Scheduled reports are email summaries of the error activity in your project over a period you choose, with week-to-week comparisons. Error Reporting generates and sends them on a daily, weekly, or monthly schedule, so your team stays informed about the stability of your application without having to open the Error Reporting console.
You can create multiple reports for a project. Combined with filters, this lets you send a separate report for each version of your application, or for any other attribute. To edit, preview, disable, or delete your reports, see Manage Scheduled Reports.
What a Report Includes
Each report gives your team a snapshot of how stable your application was during the reporting period, and how that compares with the period before. It shows how many errors occurred, which kinds of errors they were, and which devices, operating systems, or other attributes they affected, so readers can spot new problems without opening Error Reporting.
Each report includes:
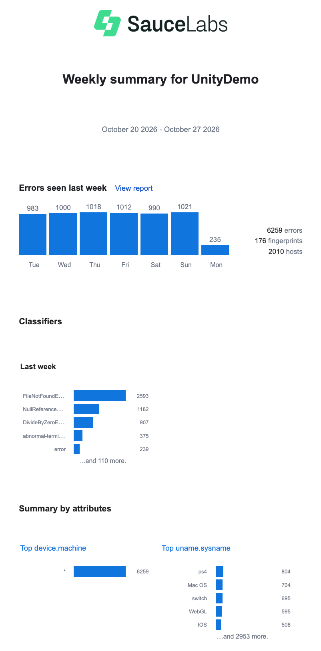
- The errors seen over the reporting period, by day, with the total number of errors, fingerprints, and hosts, and a View report link to the errors in Error Reporting.
- The classifiers of the errors.
- A summary by attributes, with the top values of attributes such as the device or operating system, and histograms of any attributes you add.
- Error-free user metrics, which show the percentage of users who haven't experienced an error, if your project is configured with Stability Monitoring.
The following is an example of a weekly report:
Create a Scheduled Report
You create scheduled reports for each project from the Scheduled reports page in the project settings. When you create a report, you choose what it covers, how often and when it is sent, who receives it, and which errors and attributes it includes. You can change any of these settings later.
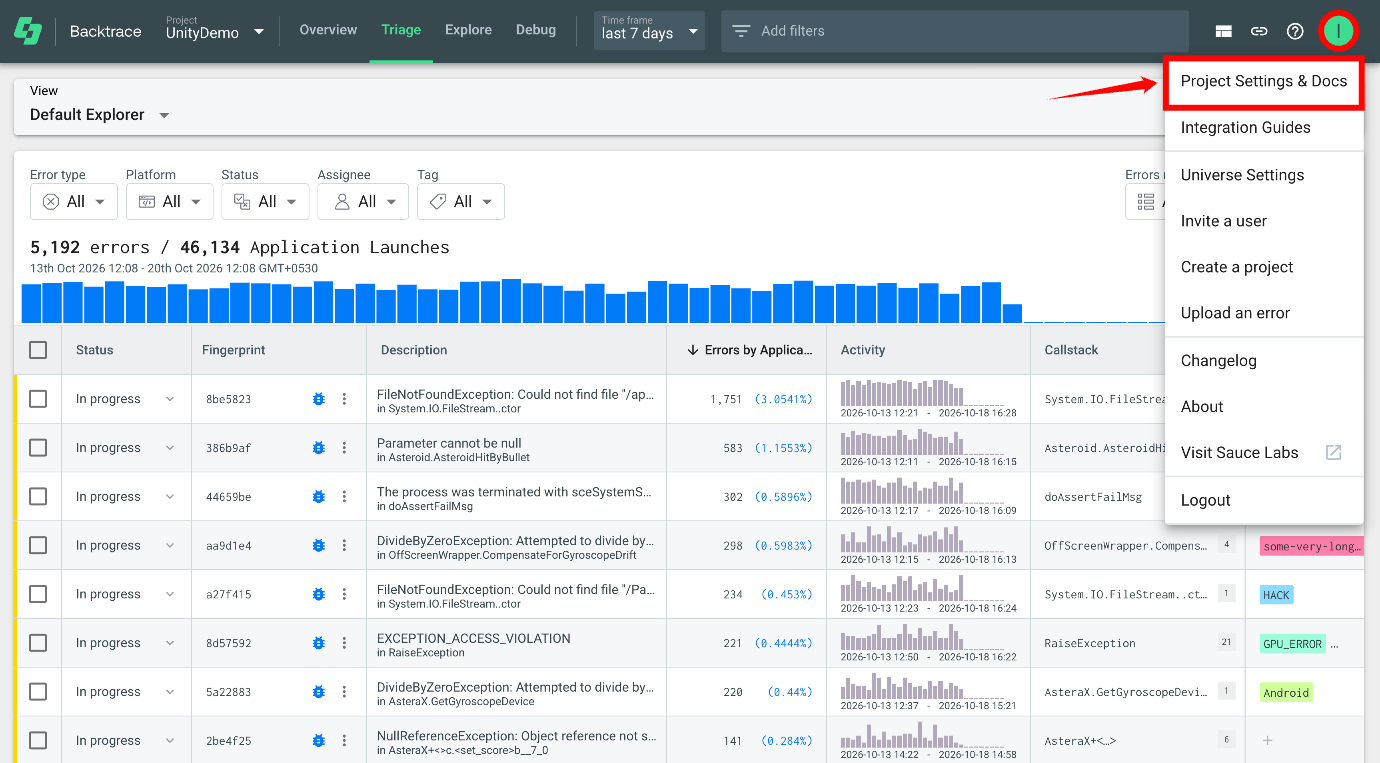
Step 1: In your project, click your profile icon in the top-right corner, and then select Project Settings & Docs.
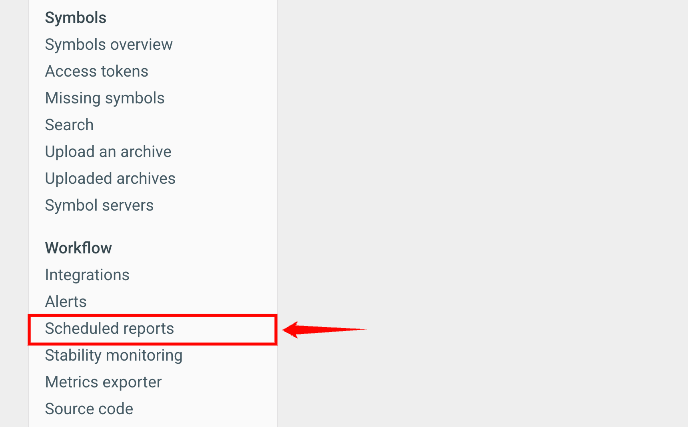
Step 2: In the left menu, under Workflow, click Scheduled reports.
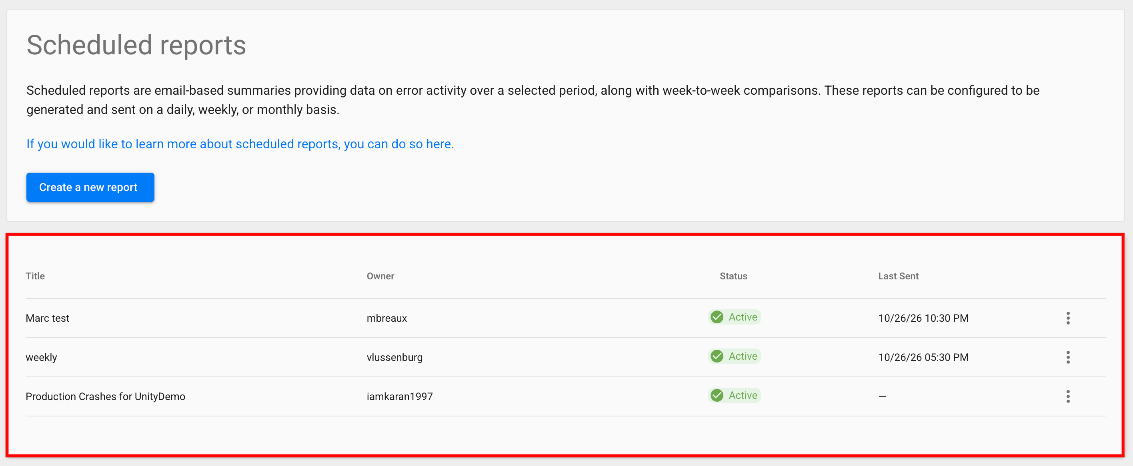
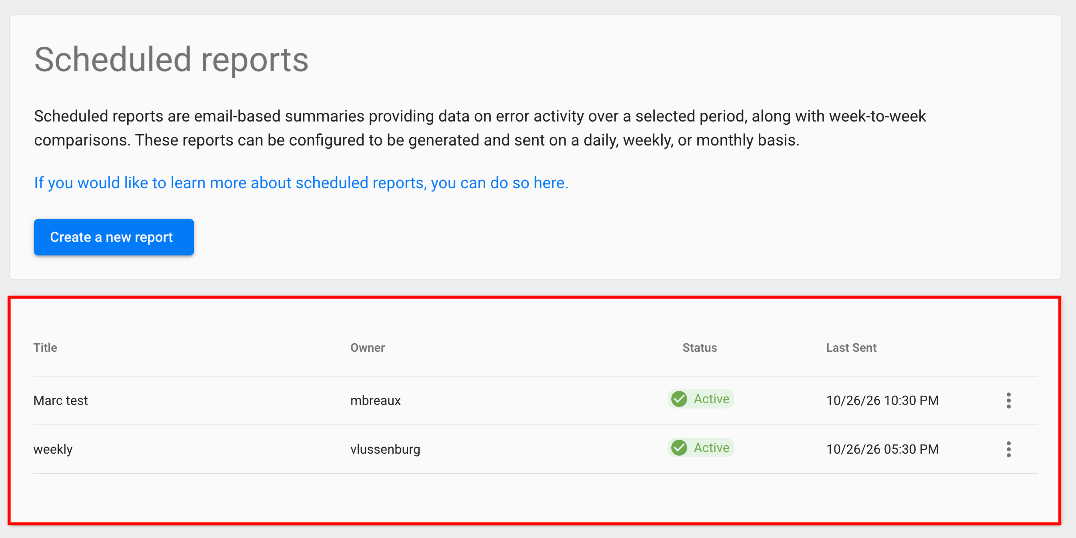
The Scheduled reports page opens. It lists the existing reports of the project, with their title, owner, status, and the date they were last sent.
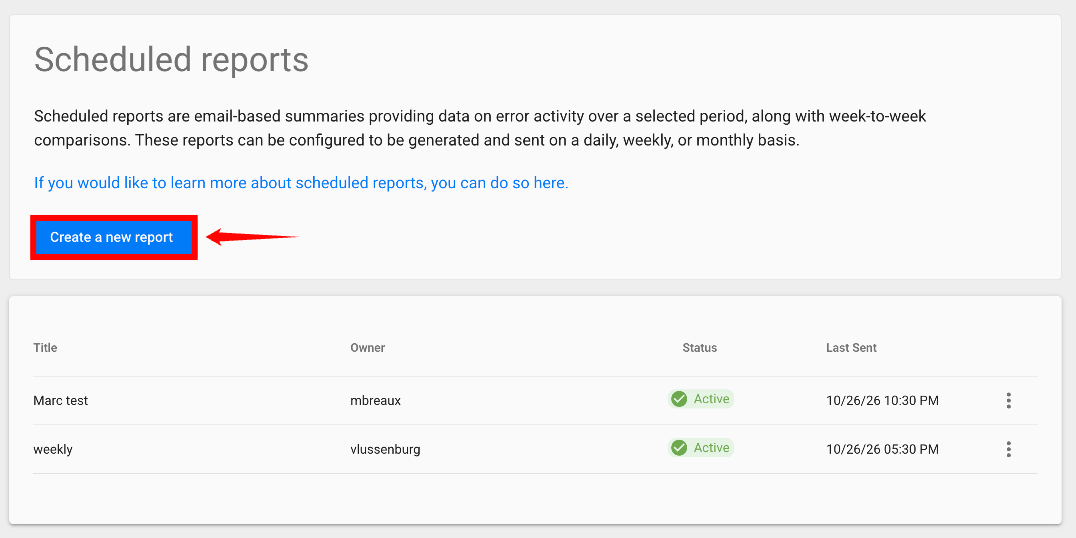
Step 3: Click Create a new report. The Report Setup form opens.
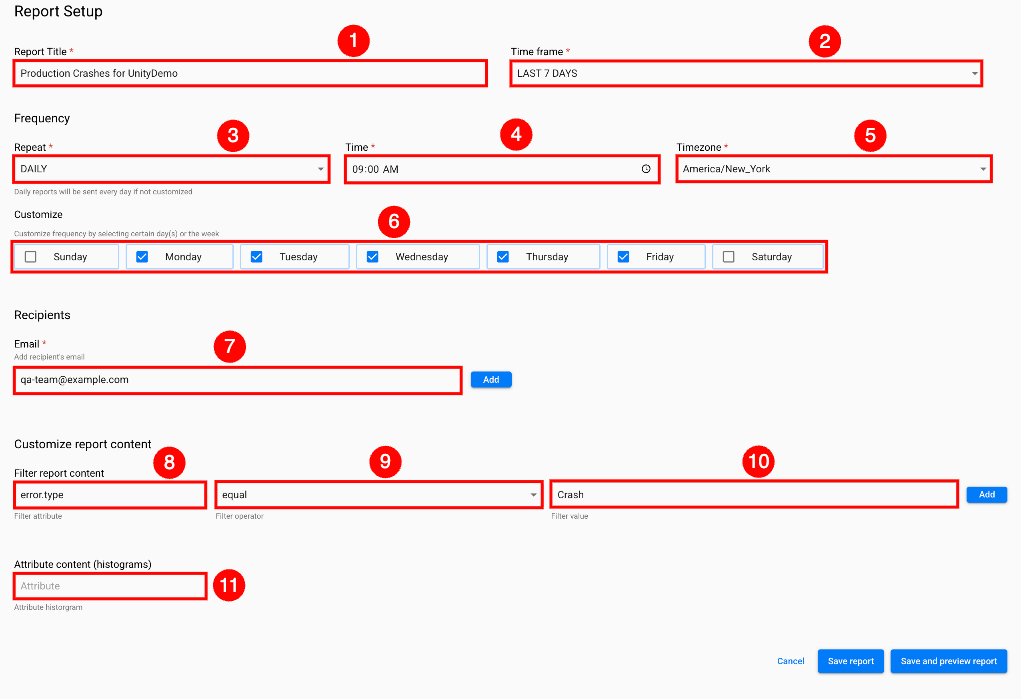
Step 4: Fill in the following fields:
| Sr. No. | Field | Description |
|---|---|---|
| 1 | Report Title | Required. The title of the report. Because you can create multiple reports, use a title that tells readers what the report covers, such as Production Crashes for UnityDemo. |
| 2 | Time frame | Required. The period of error activity the report covers, such as LAST 7 DAYS. |
| 3 | Repeat | Required. How often the report is sent: DAILY, WEEKLY, or MONTHLY. A daily report is sent every day, unless you customize the days. |
| 4 | Time | Required. The time of day the report is sent. |
| 5 | Timezone | Required. The timezone for the time the report is sent and for the timestamps in the report. For example, with 09:00 AM and America/New_York, the report is sent at 9:00 AM Eastern Time, and its timestamps are shown in Eastern Time. |
| 6 | Customize | The days of the week to send the report on. For example, clear Sunday and Saturday to send the report on weekdays only. |
| 7 | Required. The email address of a recipient. Click Add to add it, and repeat to add more recipients. You can also add mailing lists. | |
| 8 | Filter attribute | Optional. The attribute to filter the report content by, such as error.type. You can filter on any attribute. |
| 9 | Filter operator | The operator to compare the attribute with the value, such as equal. |
| 10 | Filter value | The value to compare the attribute with, such as Crash. To apply the filter, click Add. To report only on fatal errors, see How can I see only fatal errors in my report? |
| 11 | Attribute content (histograms) | Optional. The attribute to add a histogram for, such as the affected versions or operating systems. |
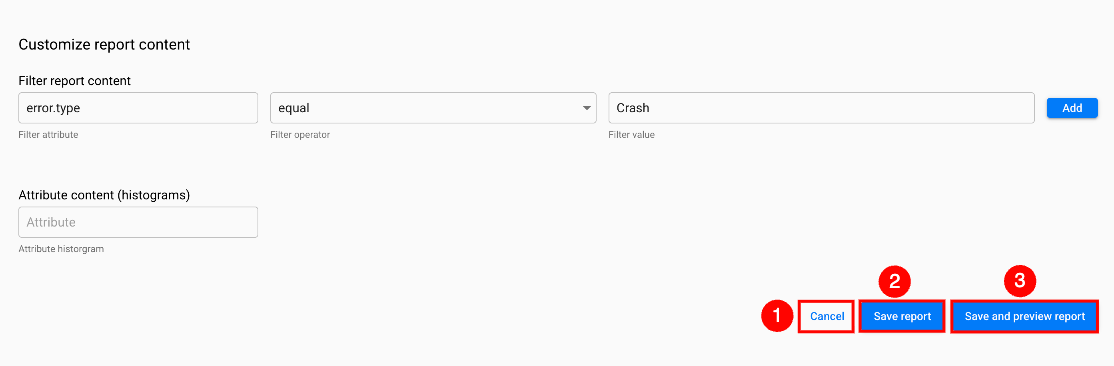
Step 5: Save the report using one of the following buttons:
| Sr. No. | Button | Description |
|---|---|---|
| 1 | Cancel | Closes the form without saving the report. |
| 2 | Save report | Saves the report. |
| 3 | Save and preview report | Saves the report and sends a preview of it to your email, so you can check its content. |
The report appears on the Scheduled reports page, with an Active status.