Other Actions
After you find a fingerprint, you can assign it, track it in an issue tracker, document it, and investigate its cause.
These actions help you move a fingerprint from discovery to resolution. Assigning an owner and linking an issue make it clear who is handling the error and where the work is tracked. Comments and tags keep your findings organized so others can follow them. Custom metric columns let you compare fingerprints by the attributes that matter to your team. Merging keeps related errors together so they are tracked as a single issue.
Assign a Fingerprint
Assign a fingerprint to the user who will investigate or resolve it. Assigning a fingerprint changes its status to In Progress, so your team can see which fingerprints are being worked on.
Assign a fingerprint when:
- A specific engineer needs to investigate the issue.
- You want to make it clear who owns the fingerprint.
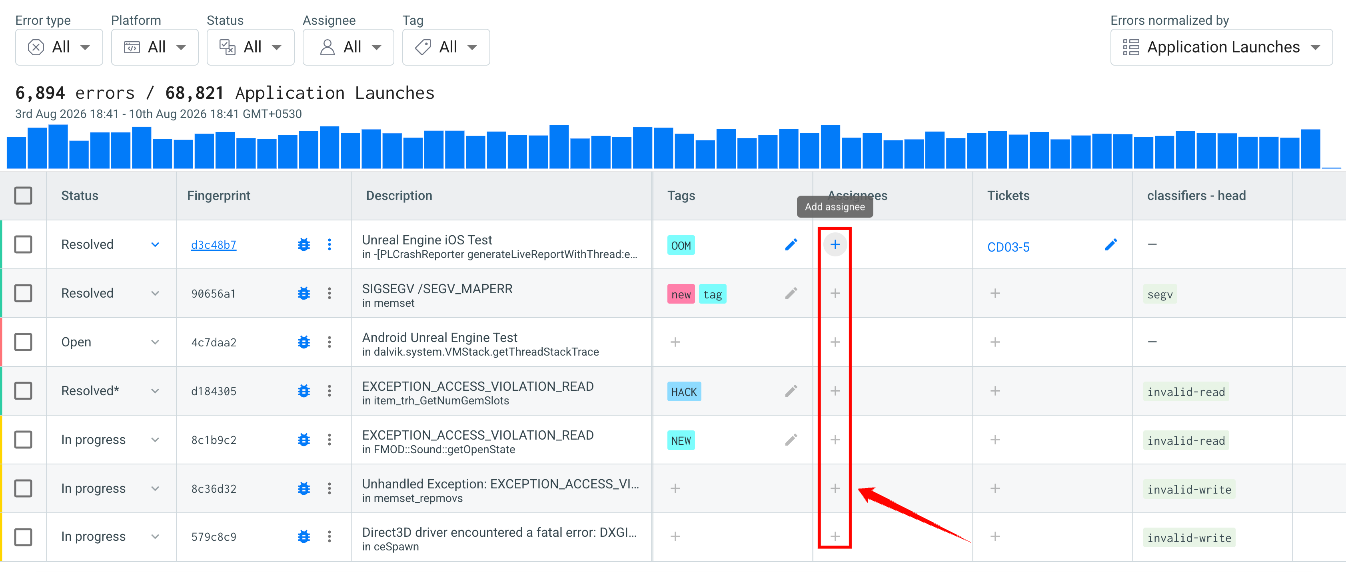
Link a Fingerprint to an Issue
To create or link Jira or GitHub issues from a fingerprint, your project must first be integrated with Jira or GitHub. For setup instructions, see Jira Integration and GitHub Integration.
Create an issue for a fingerprint in an external issue tracker, such as Jira or GitHub Issues. The issue includes information about the fingerprint and a link back to it in Error Reporting, so you can track both together. Linking an issue changes the fingerprint's status to In Progress.
Link a fingerprint to an issue when:
- Your team tracks work in Jira or GitHub Issues.
- The issue needs to go through your existing development workflow.
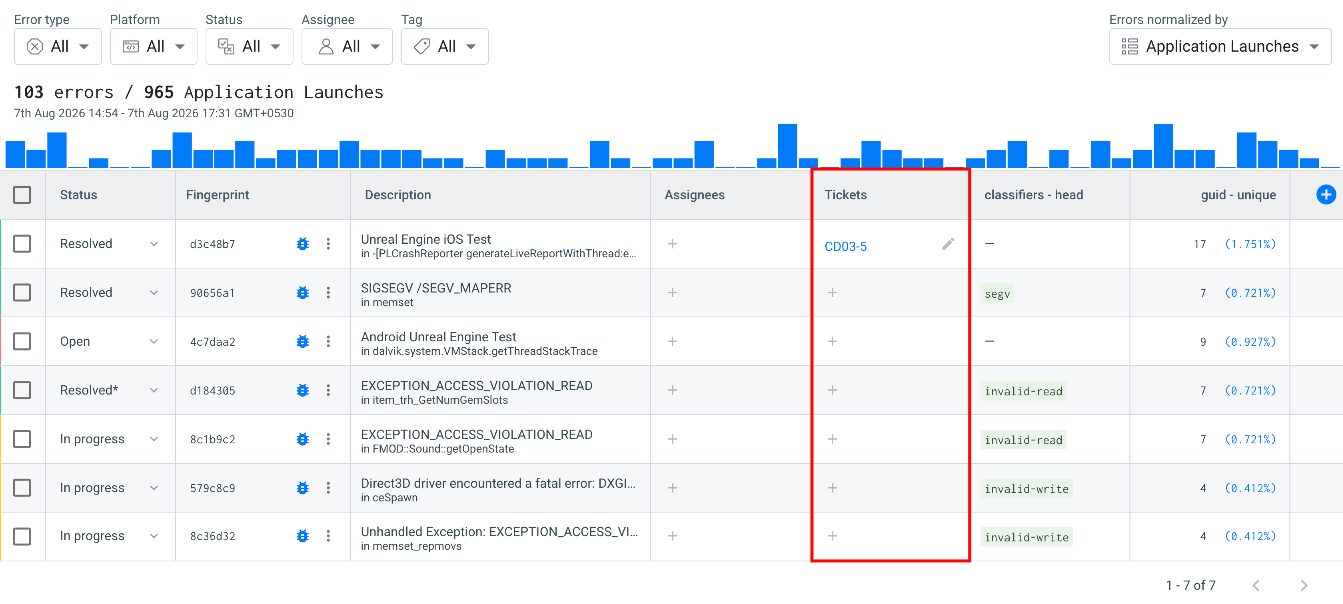
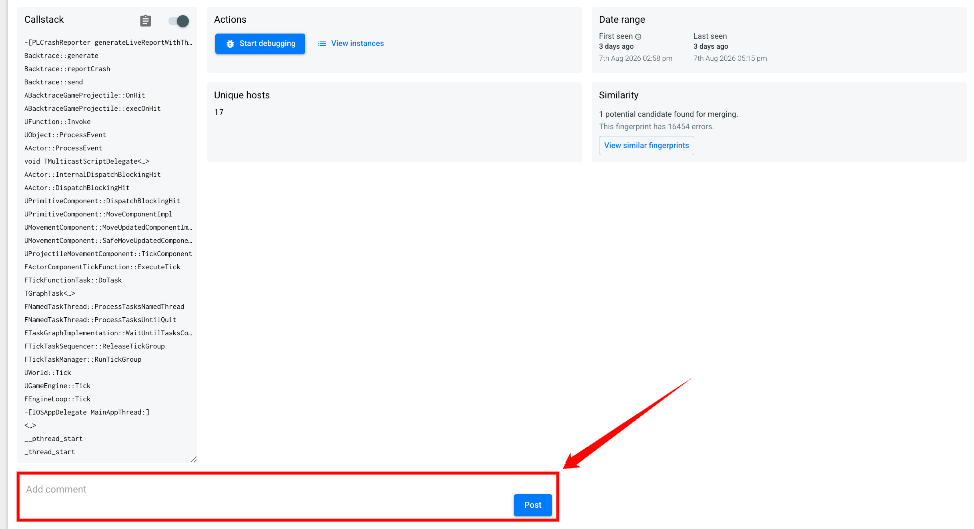
Add Comments and Tags
Add Comments
The fingerprint's Details view includes a comment thread. Use comments to record investigation findings, add context, or share updates with your team. You can add and edit comments.
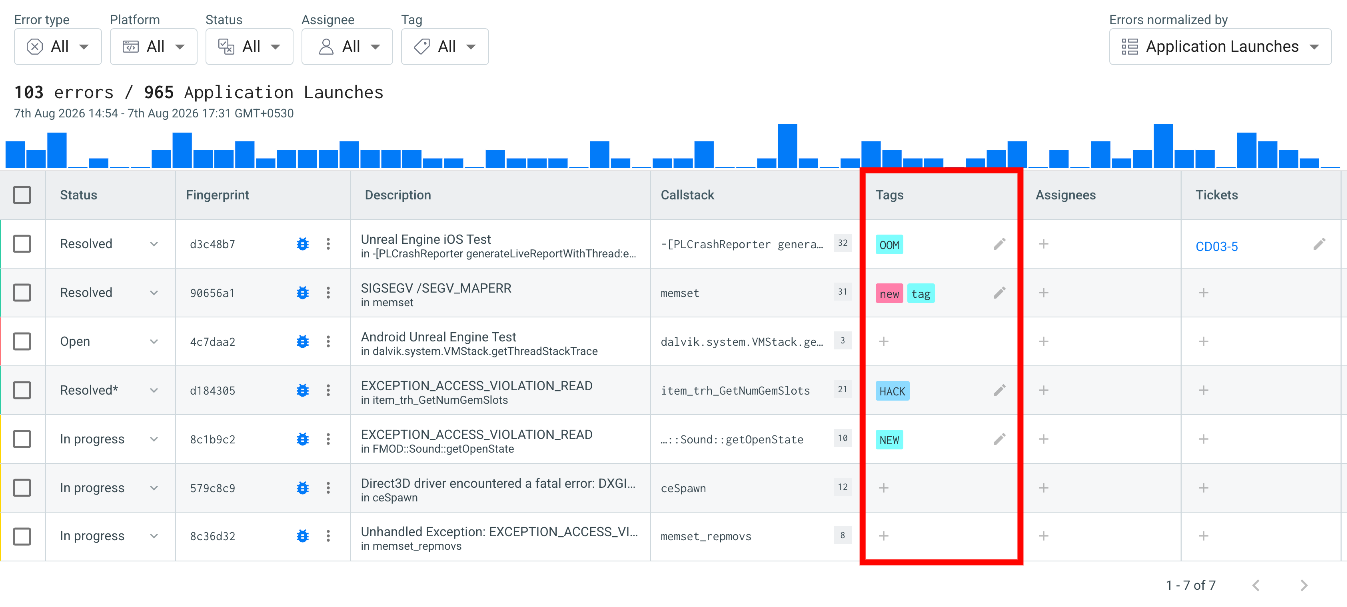
Add Tags
Tags let you group and classify fingerprints in whatever way suits your team, such as fingerprints that share a characteristic or need the same follow-up.
To add a tag, click the + icon in the fingerprint's Tags column, then select the tag.
Add Custom Metric Columns
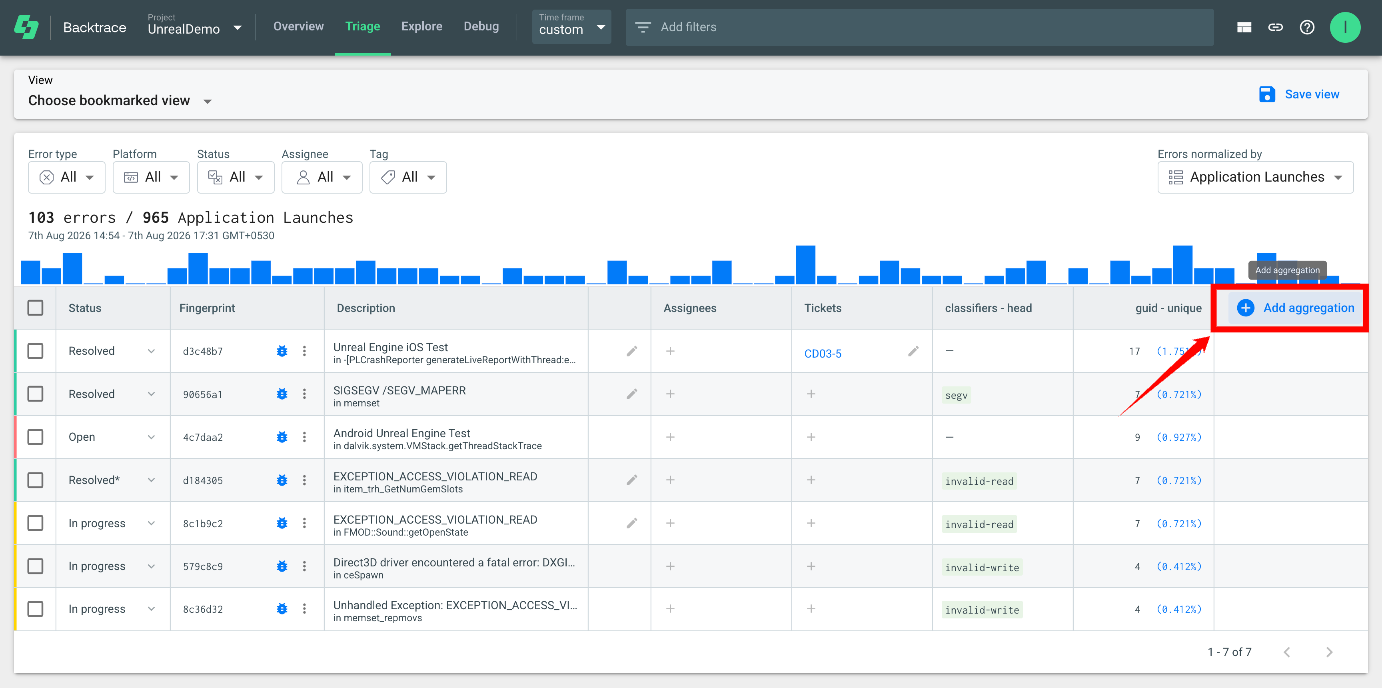
Add custom metric columns to the Triage view to analyze fingerprints by specific attributes.
Step 1: In the Triage view, click Add aggregation at the end of the table.
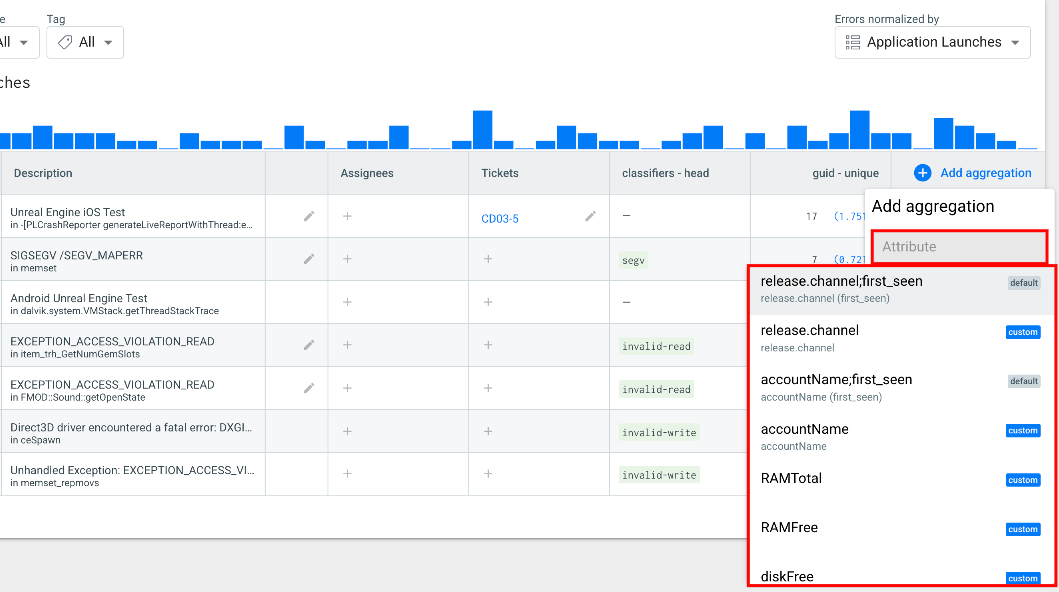
Step 2: In the Add aggregation dialog, select an Attribute. The list includes both default and custom attributes.
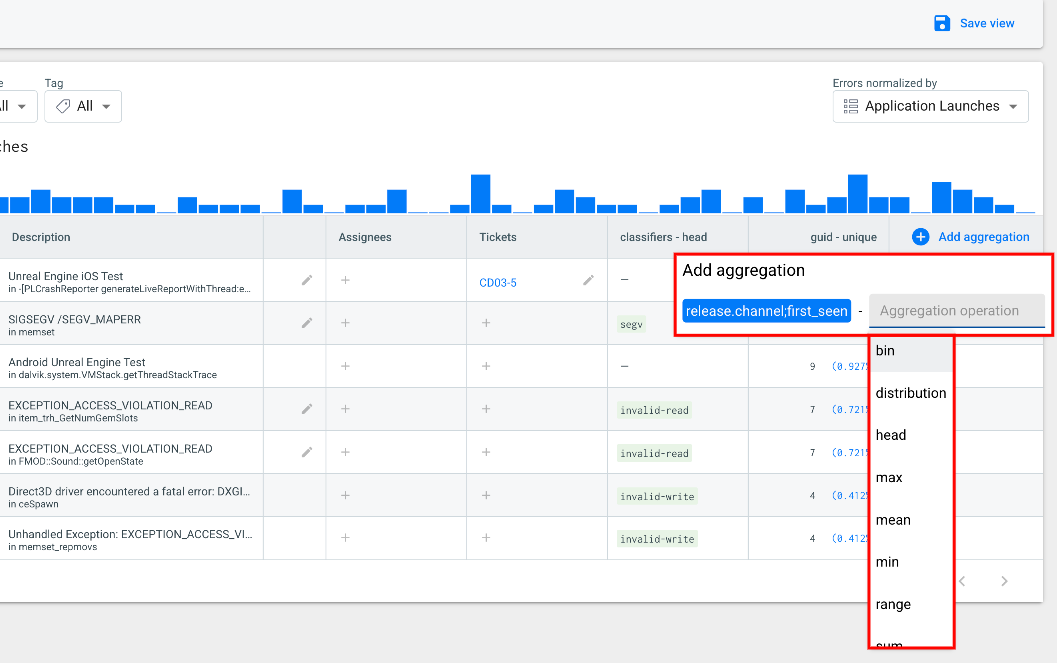
Step 3: Select an Aggregation operation to choose how the attribute is summarized in the column.
Aggregation Operations
The aggregation operation decides how Backtrace summarizes the attribute across the errors in each fingerprint. The available operations include:
| Operation | Description |
|---|---|
| bin | Groups the attribute's values into ranges. |
| distribution | Shows how the attribute's values are distributed. |
| head | Shows a single value of the attribute. |
| max | Shows the highest value. |
| mean | Shows the average value. |
| min | Shows the lowest value. |
| range | Shows the lowest and highest values. |
| sum | Shows the total of all values. |
Merge or Unmerge Fingerprints
Merge Fingerprints
Merge fingerprints when two or more of them represent the same underlying issue. This keeps related errors from being tracked as separate issues.
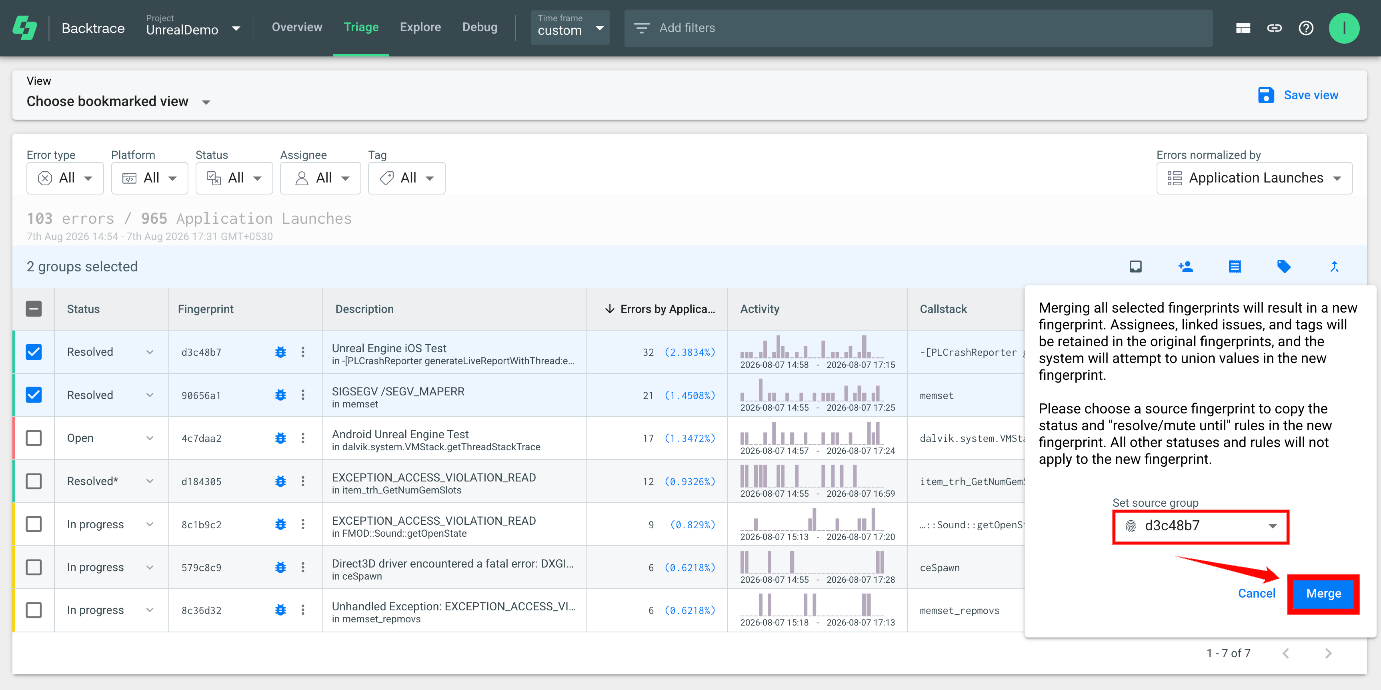
Step 1: In the Triage view, select the fingerprints to group together, then select Merge.
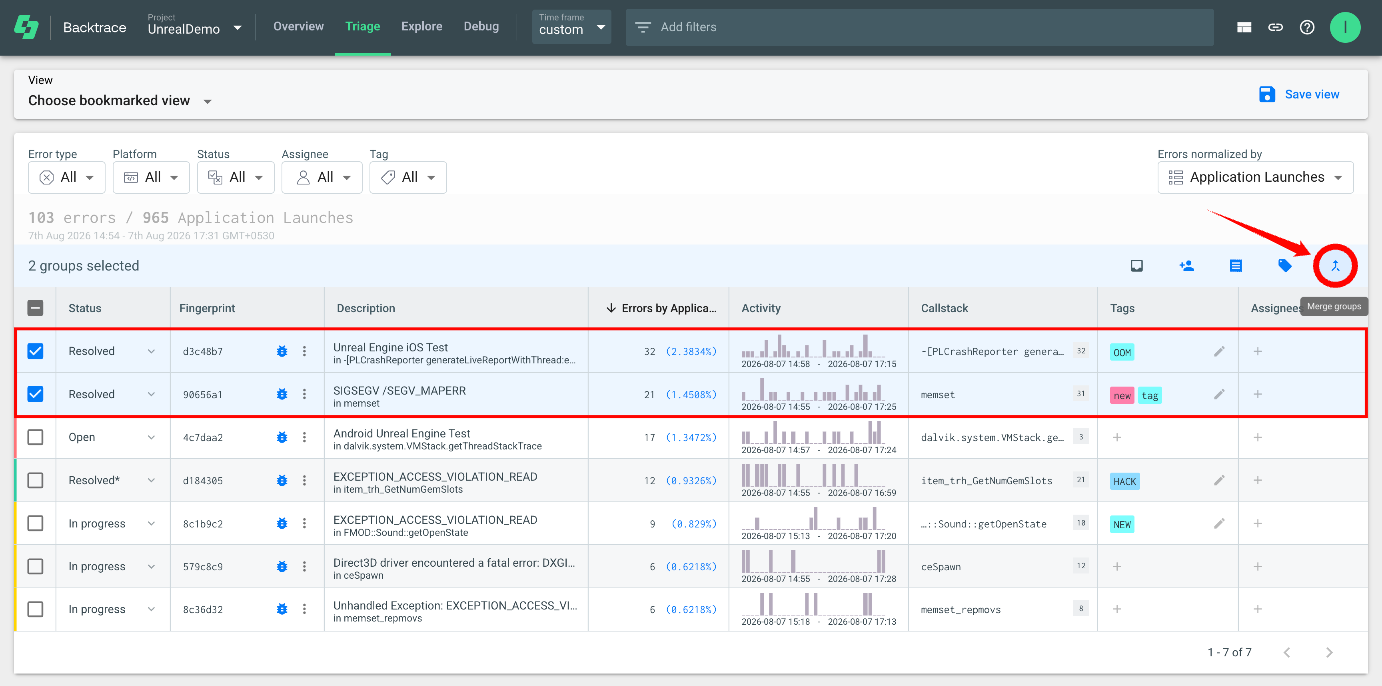
Step 2: Error Reporting creates a new fingerprint. Future errors that match any of the merged fingerprints are grouped under it.
Unmerge Fingerprints
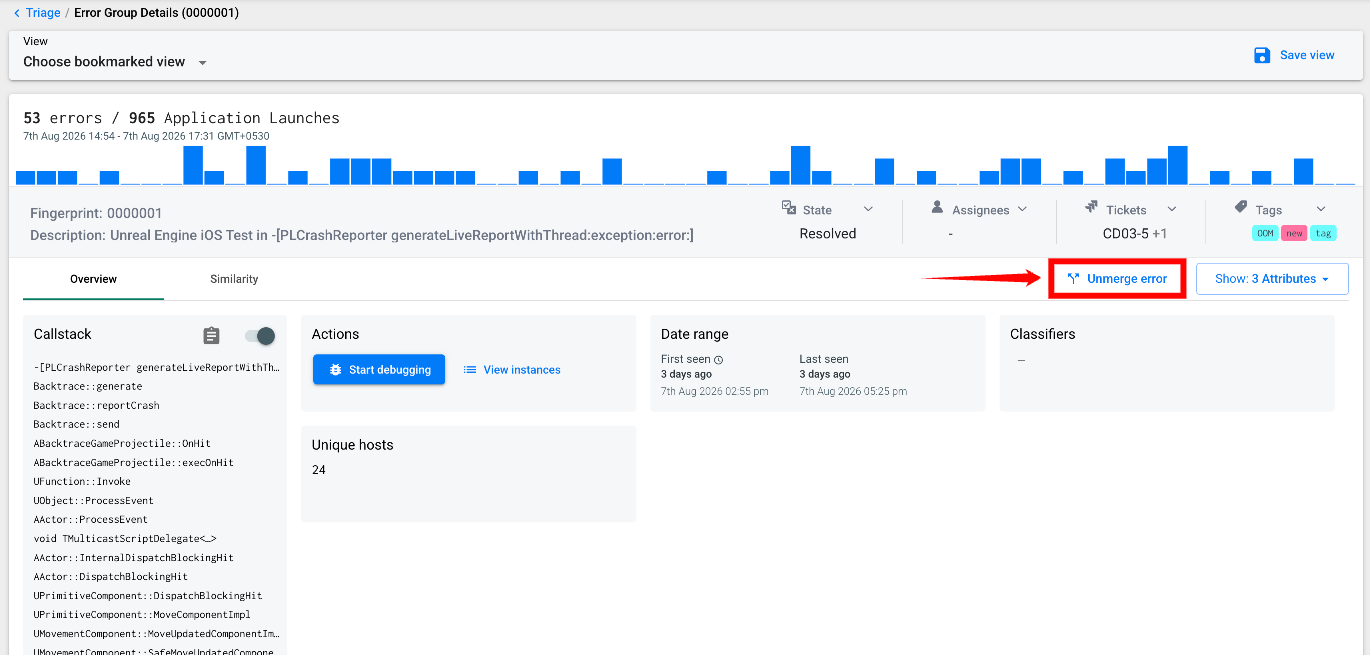
If fingerprints were merged by mistake, or should no longer be grouped, select Unmerge in the fingerprint's Details view.
For more information about how Error Reporting groups errors into fingerprints, see Deduplication.
Inspect and Copy the Callstack
The callstack shows where an error occurred in your application.
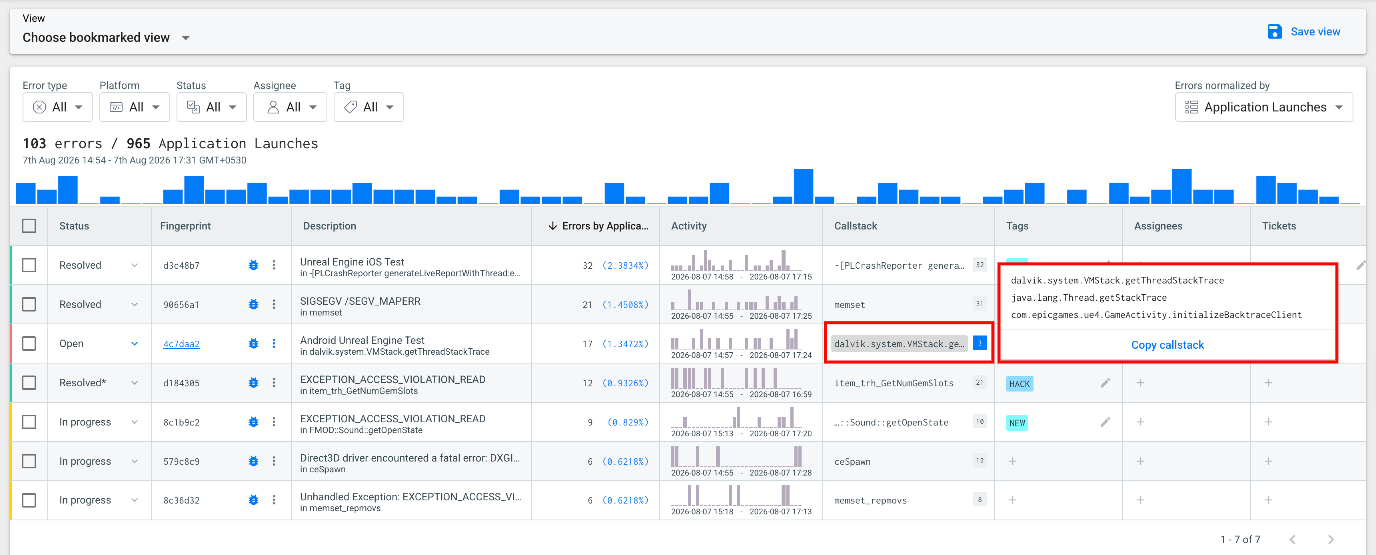
To see more frames without opening the full callstack, hover over the fingerprint's Callstack in the Triage view.
To share or investigate the complete callstack, select Copy Callstack from the pop-up.
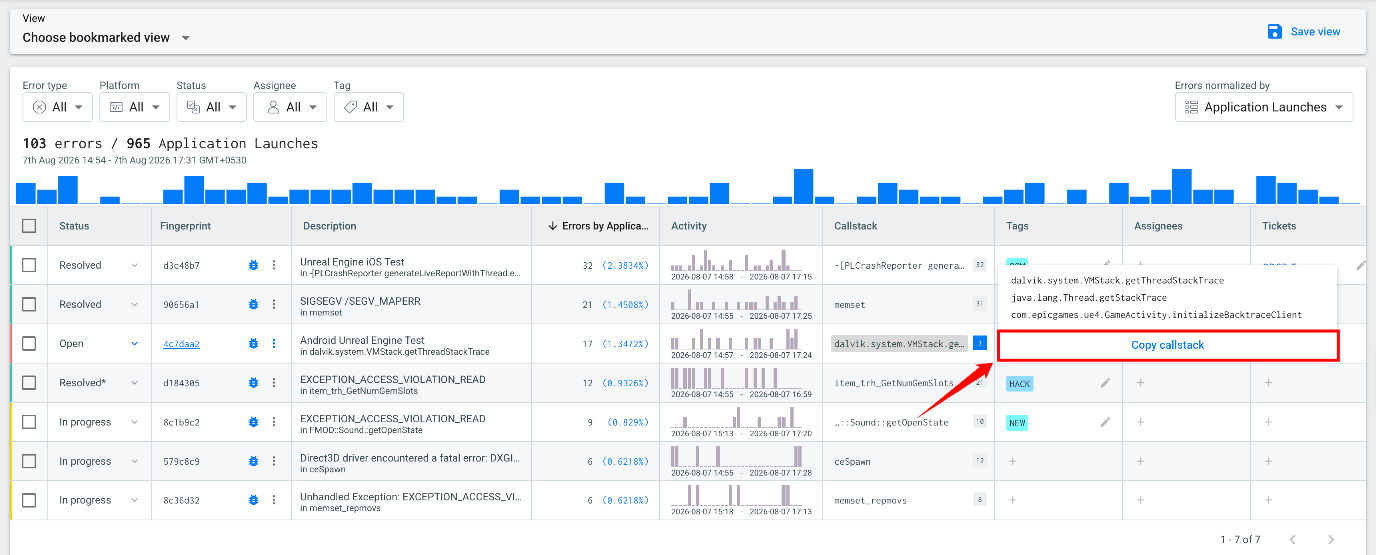
The callstack you see and the callstack you copy can differ:
- The callstack shown in the Triage view is normalized and deduplicated. It identifies the common location of the error.
- The copied callstack contains the raw callstack data, including frame and line numbers, for deeper investigation.