Uploading to Apple App Store
To enable the feature, reach out to support.
Sauce Labs Mobile App Distribution allows you to upload your production app directory to the Apple App Store.
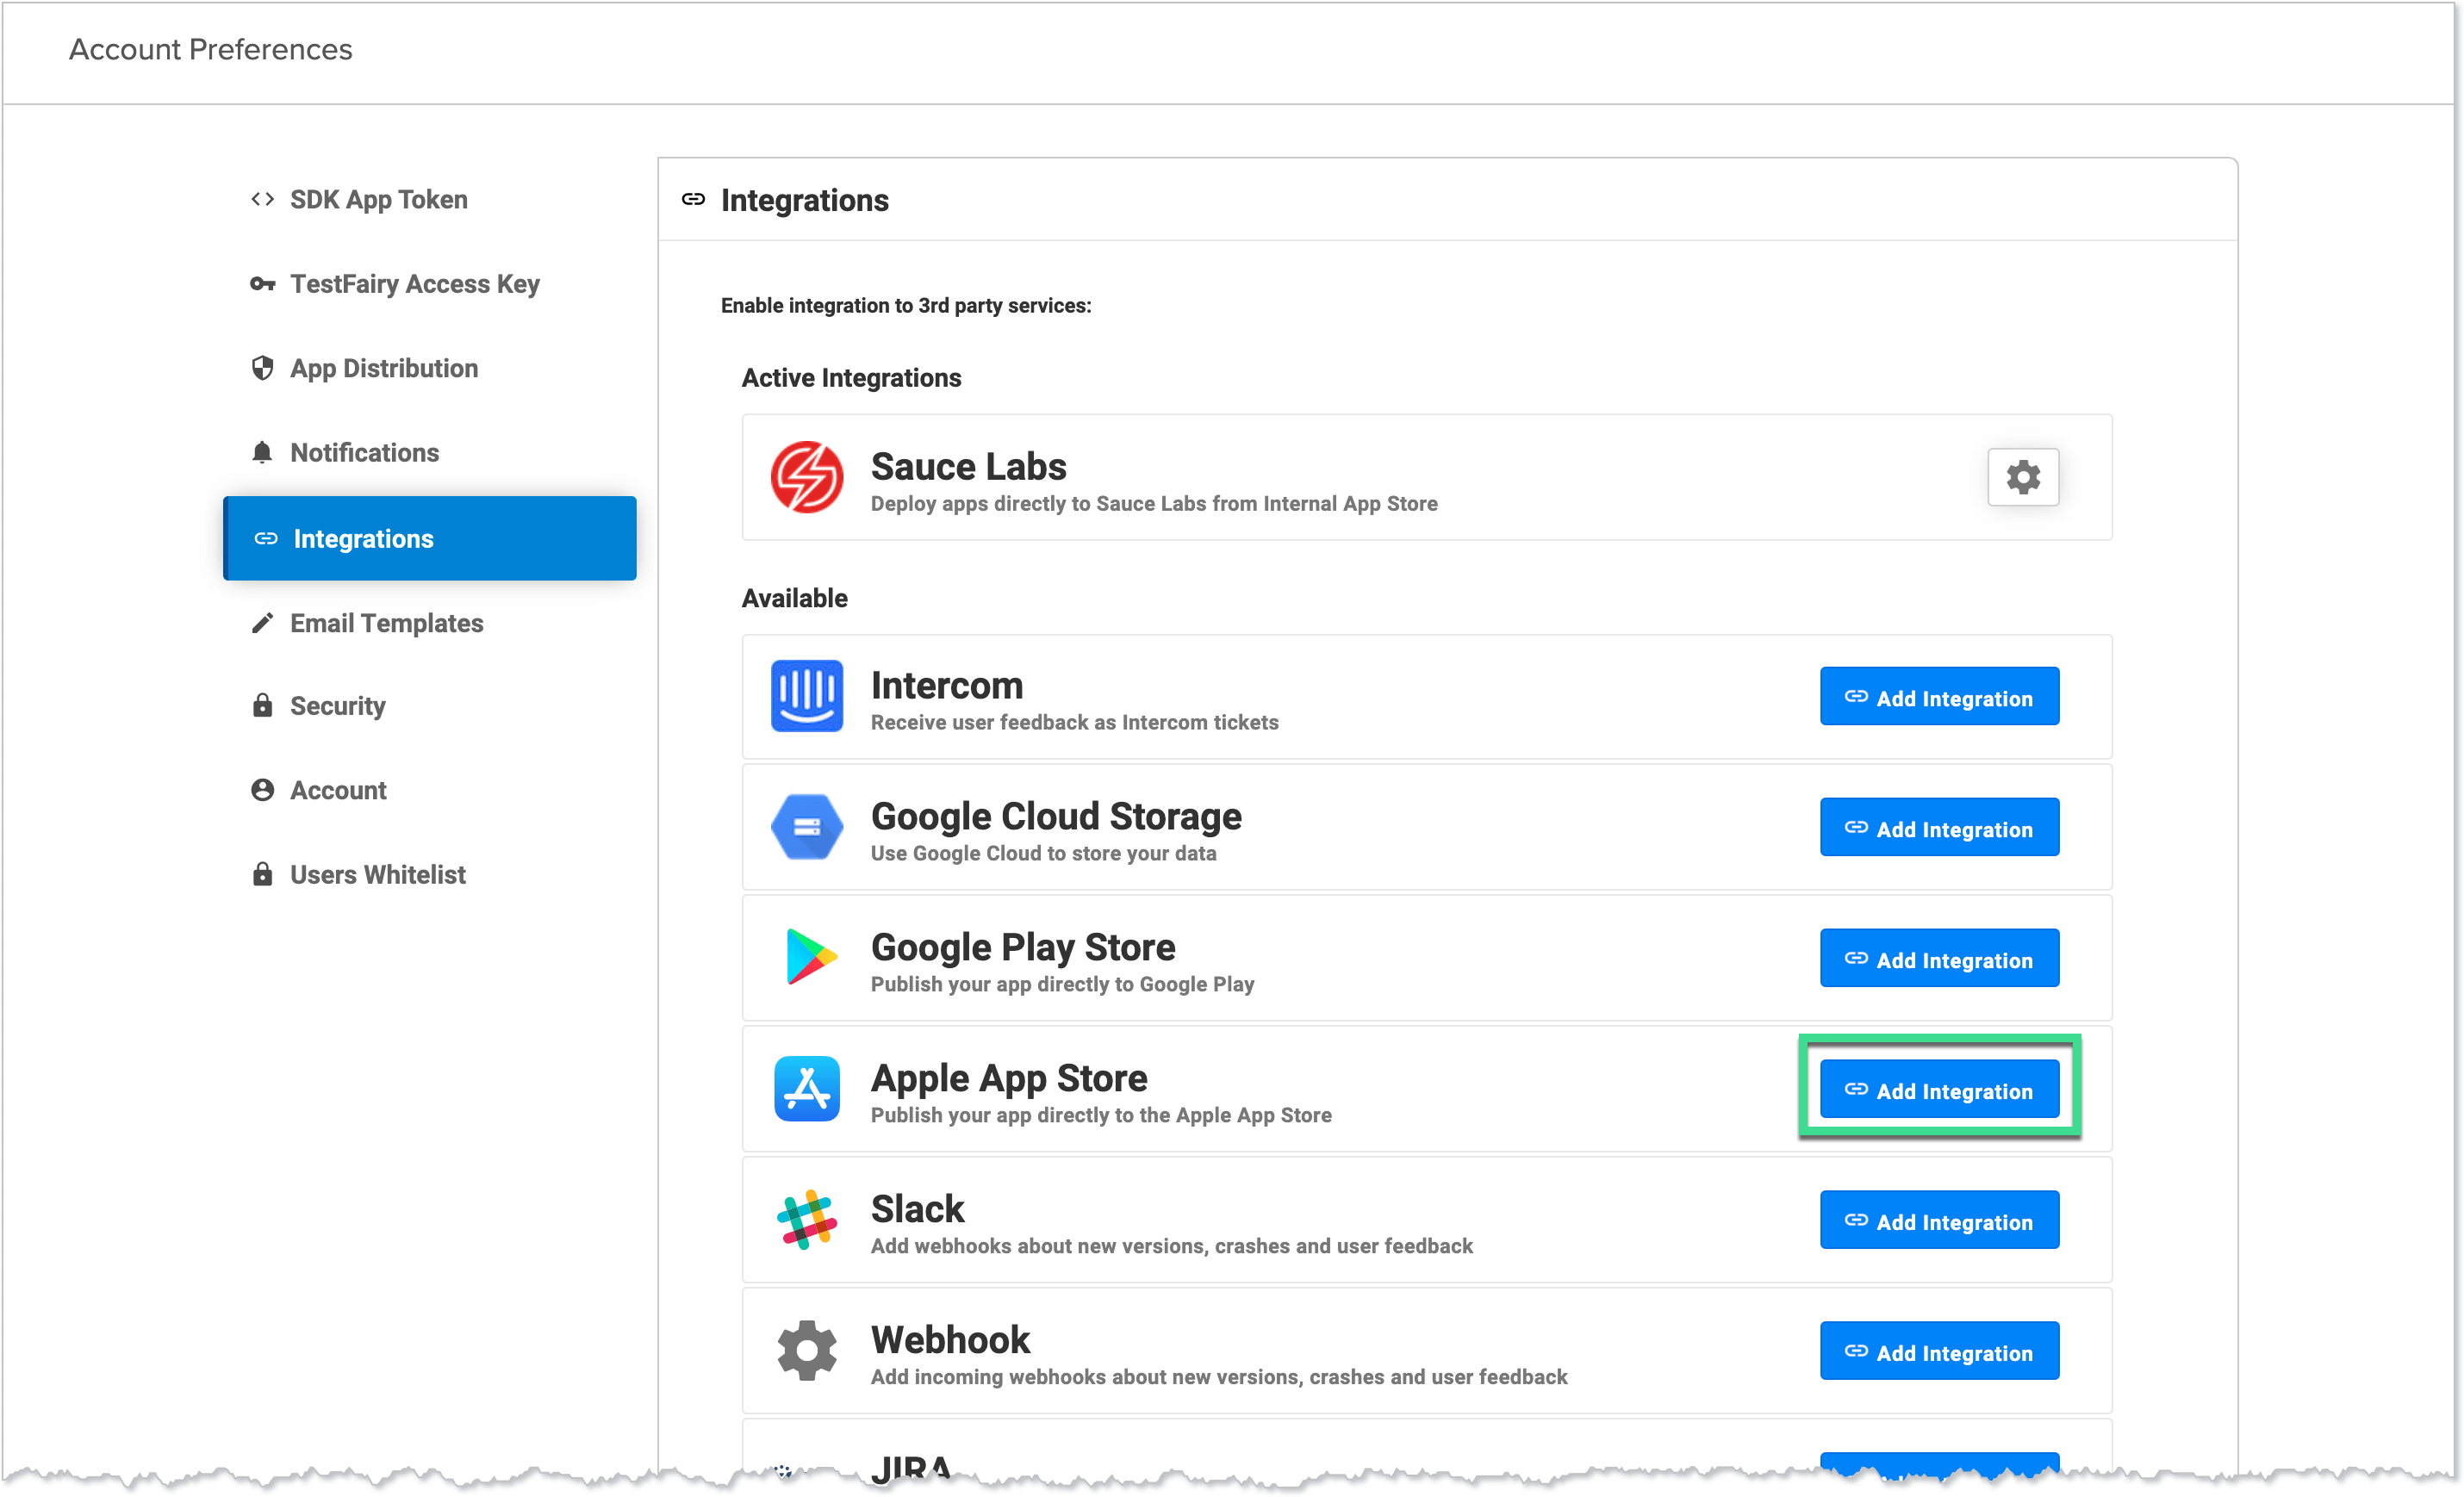
Configuring the Integration
On the Account Preferences, next to Apple App Store, click Add Integration.
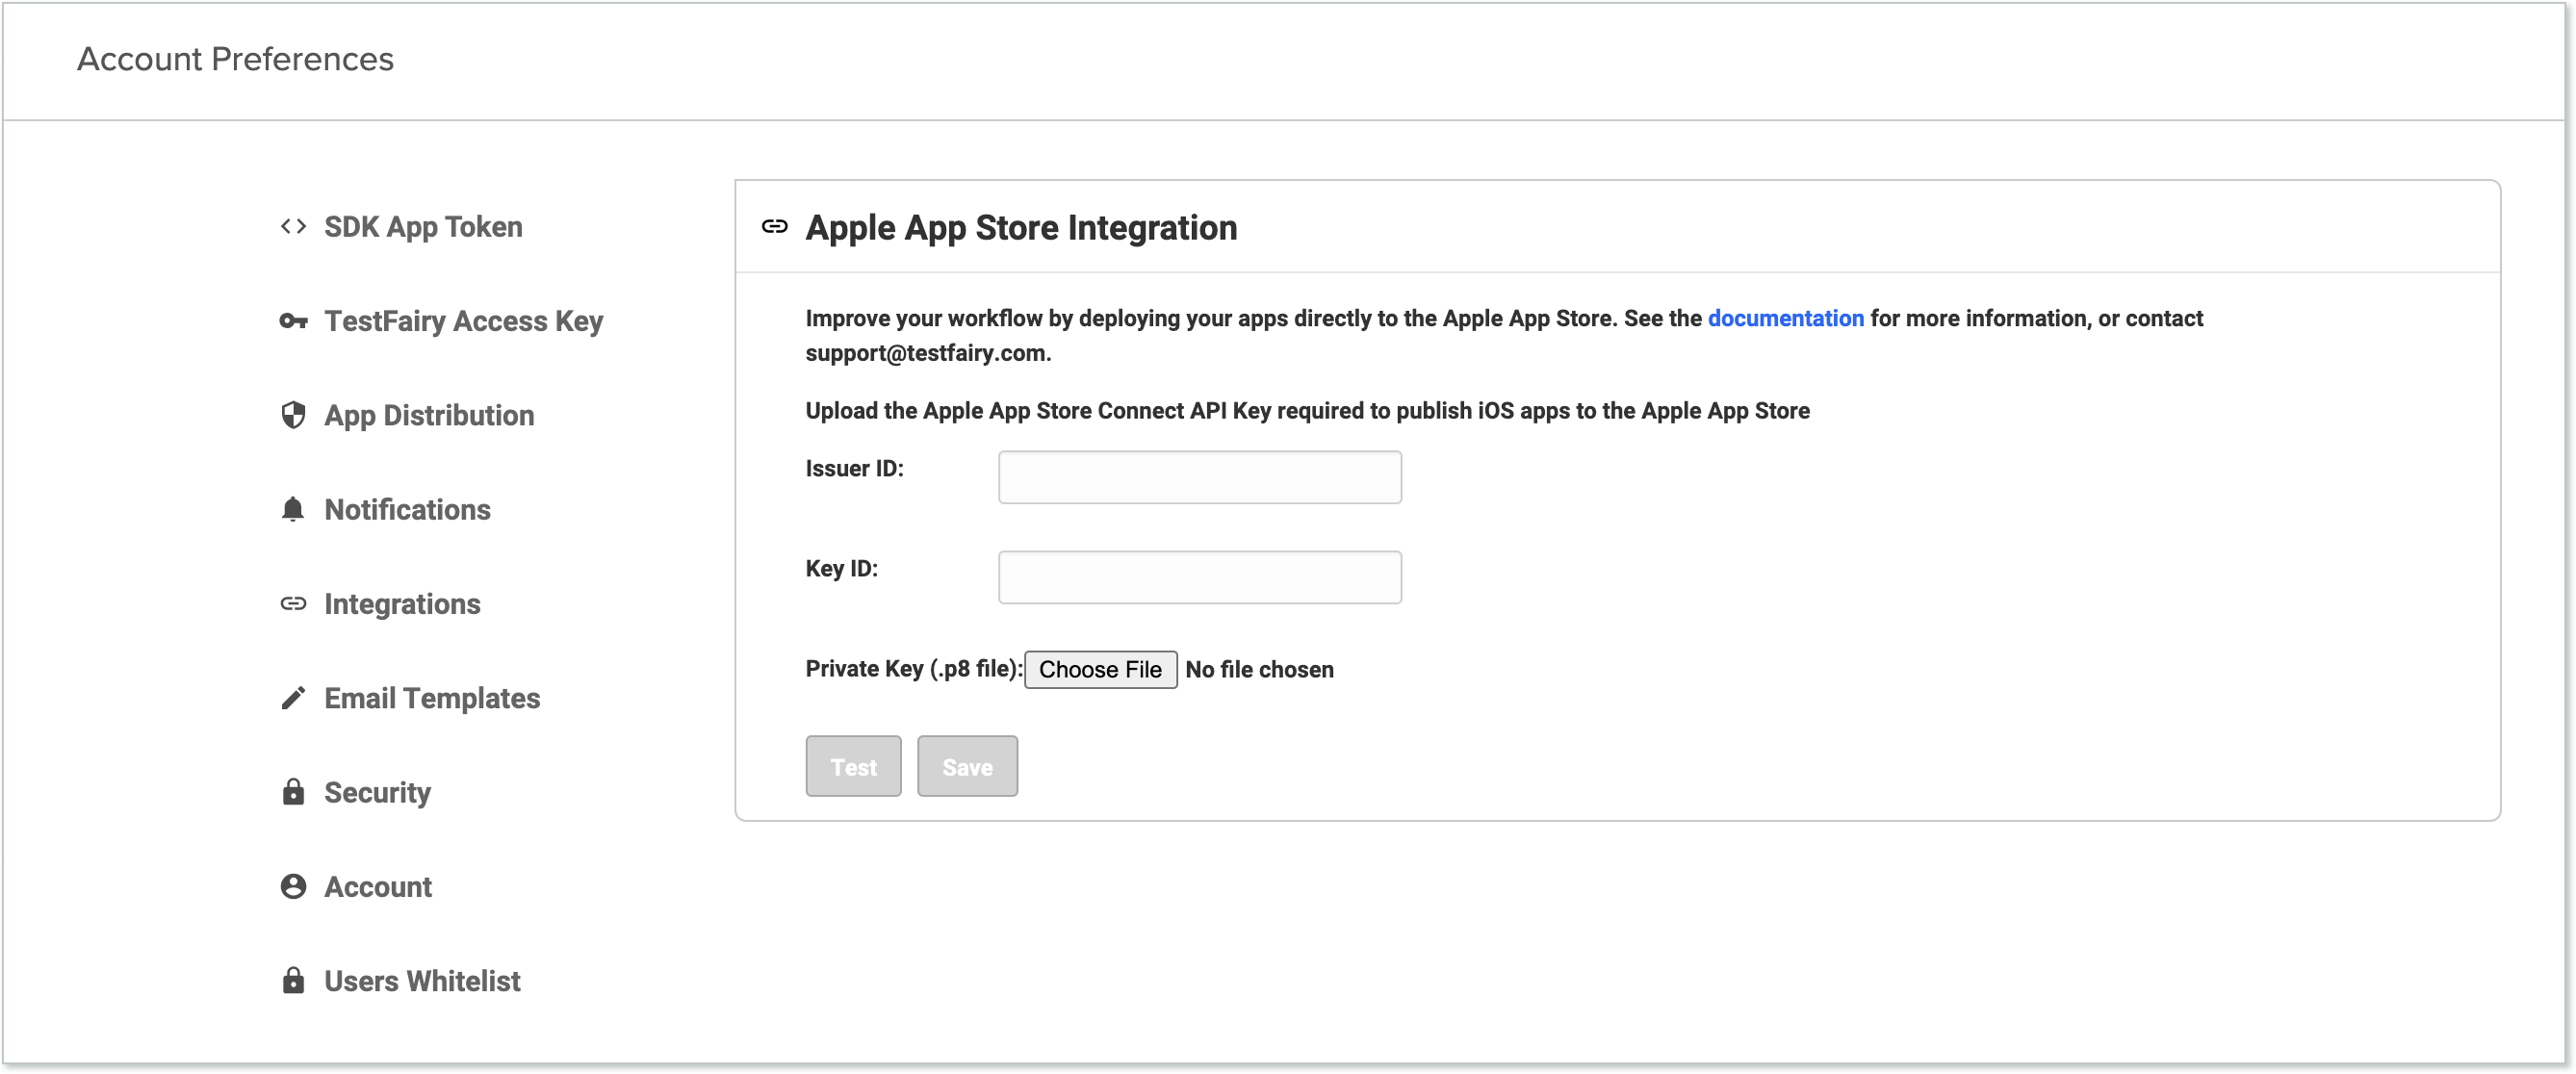
You have to create credentials from Apple iTunesConnect to upload apps. You can get the credentials by going to the User and Access, selecting the Keys tab, and then choosing App Store Connect API. Click + to add a new set of keys. Be sure to download the .p8 file used to sign API requests, and take note of the Issuer ID and the Key ID. You have to give Admin access to these keys to upload an app from Sauce Labs Mobile App Distribution to the Apple App Store.
Once you have the Issuer ID, Key ID, and the private key (.p8), go back to the settings page, fill in the form with the necessary keys, and upload the private key.
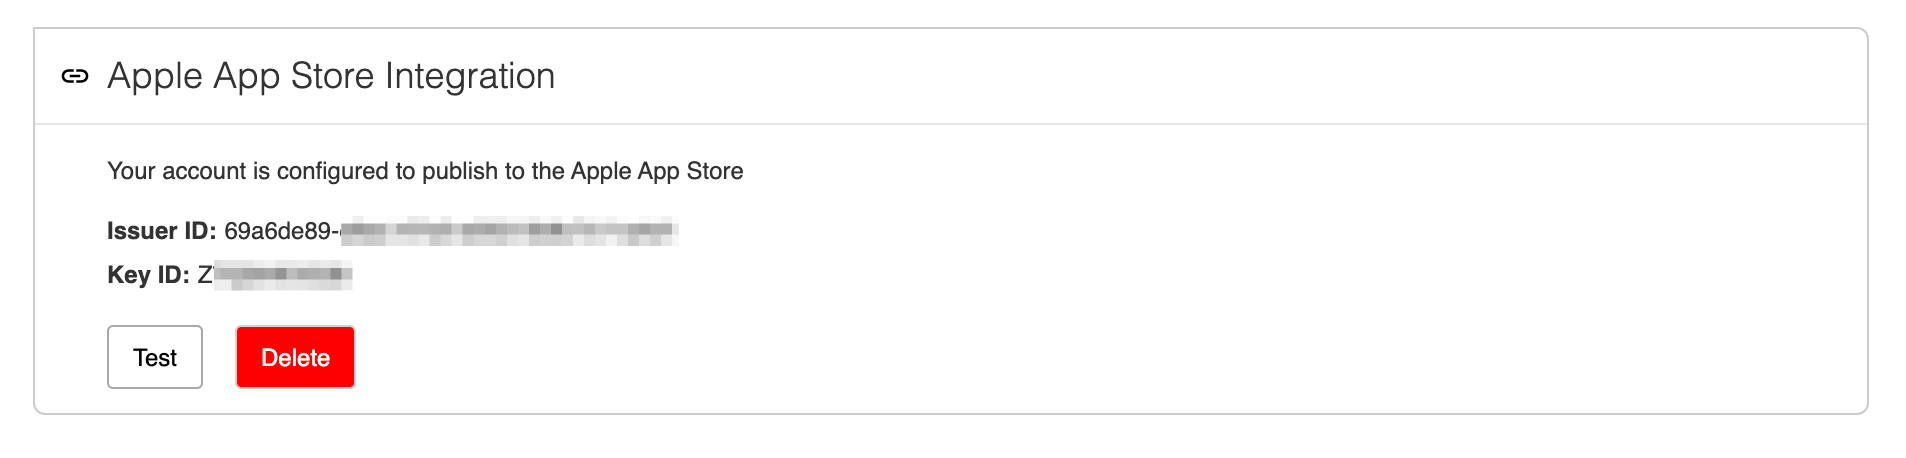
Once uploaded, you see the associated Issuer ID and Key ID on the integration page. Verify the account matches the one in App Store Connect.
Uploading
From any build page, click Upload.
Apple requires a metadata file to upload a build to the App Store. If the file is not uploaded, you prompt the following screen:
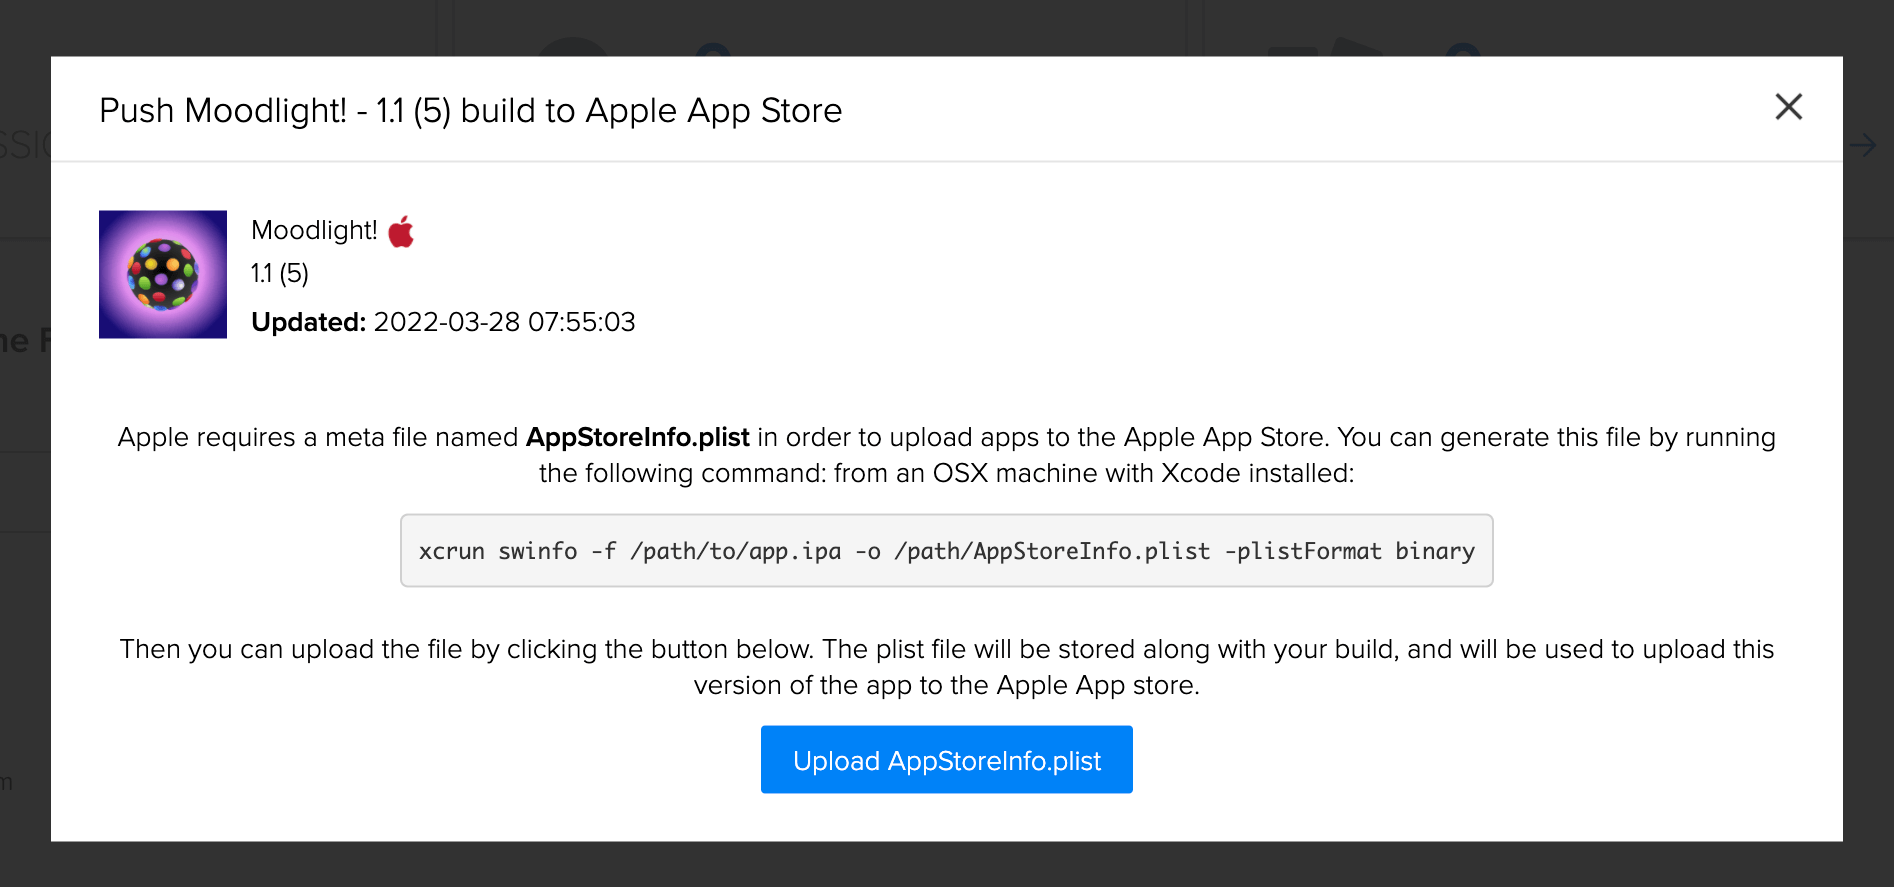
Your build system can generate the metadata with the following command:
xcrun swinfo -f /path/to/app.ipa -o /path/AppStoreInfo.plist -plistFormat binary
After uploading the metadata, you see an upload dialog summarizing what will be uploaded to Apple Store.
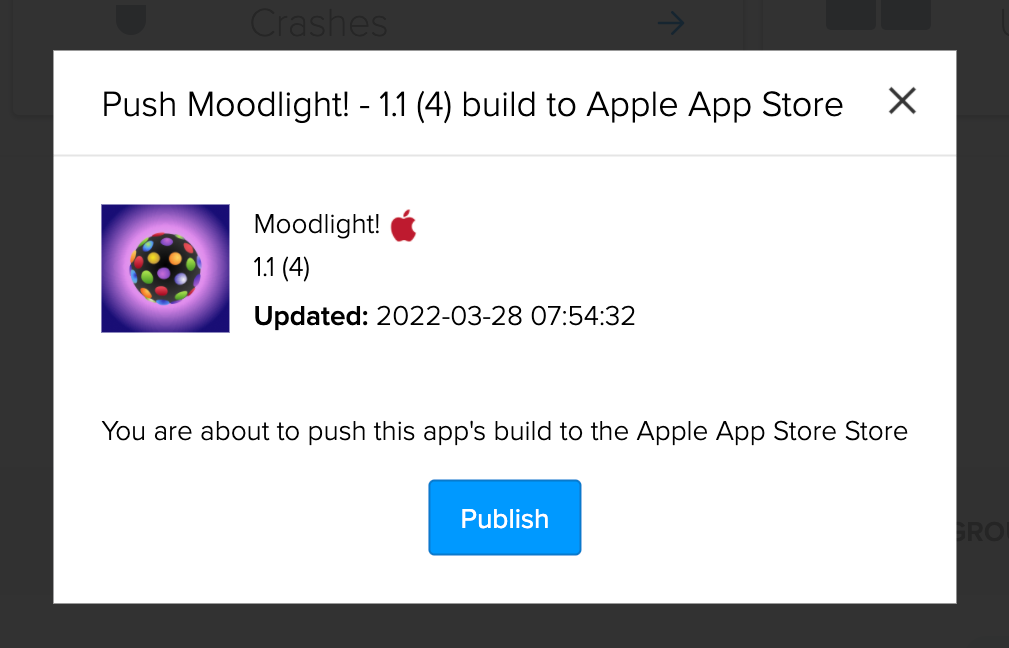
Sauce Labs Mobile App Distribution will not publish your app publically; it only uploads the build to the store. The app owner in Apple iTunesConnect must publish the app itself publically.
After uploading, the dialog will display the uploaded state of the app.
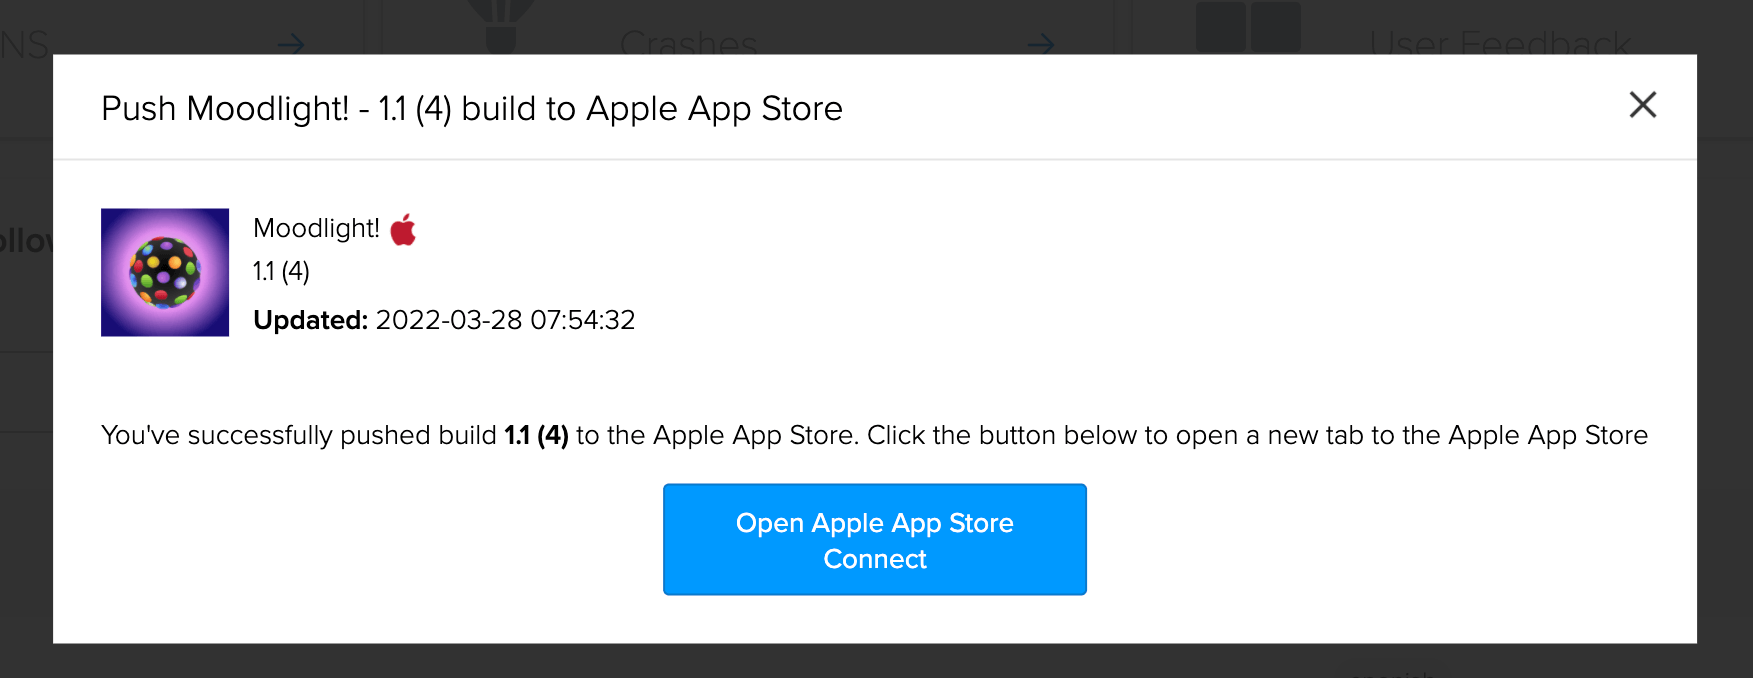
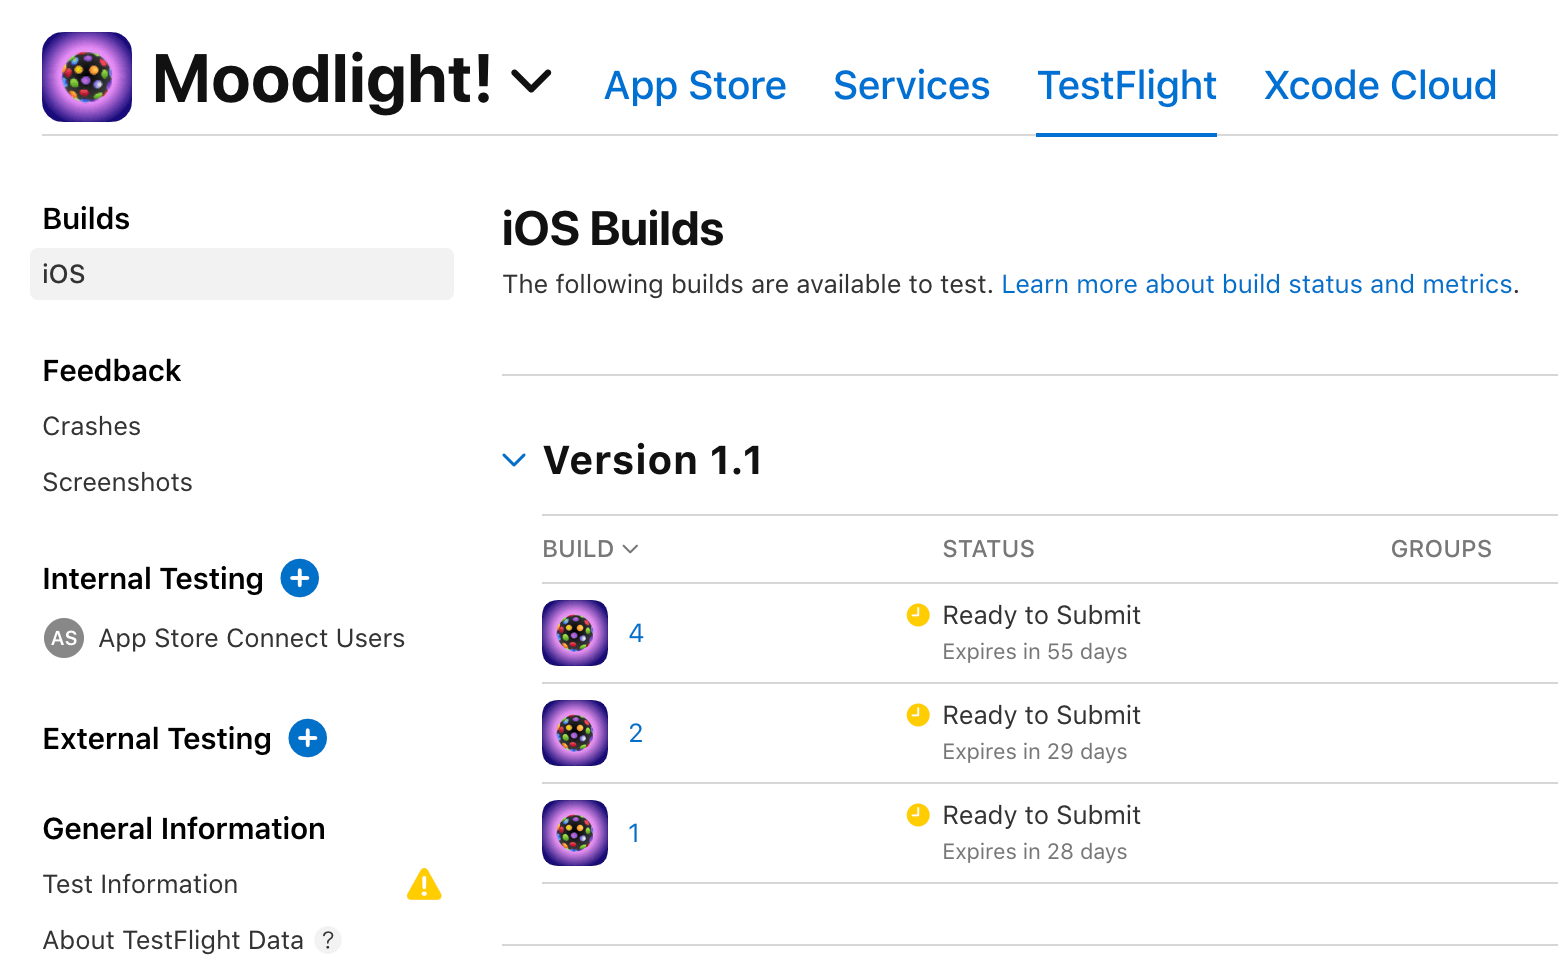
If you go into Apple iTunesConnect, your app is listed in the "TestFlight" section under "iOS Builds".