Managing and Distributing Your App
The distribution process begins once you have uploaded your application.
For Android applications, refer to Uploading Apps.
If you're distributing an iOS application:
- When using an enterprise certificate, the process mirrors the Android distribution.
- With an ad-hoc certificate, you will need to add tester device UDIDs to your provisioning profile before distributing.
If you're distributing a macOS application, first zip the application (before zipping, the file extension will be .app; after zipping, it will become .zip). Then, proceed with the process described in Uploading Apps.
Distributing your application is a straightforward process:
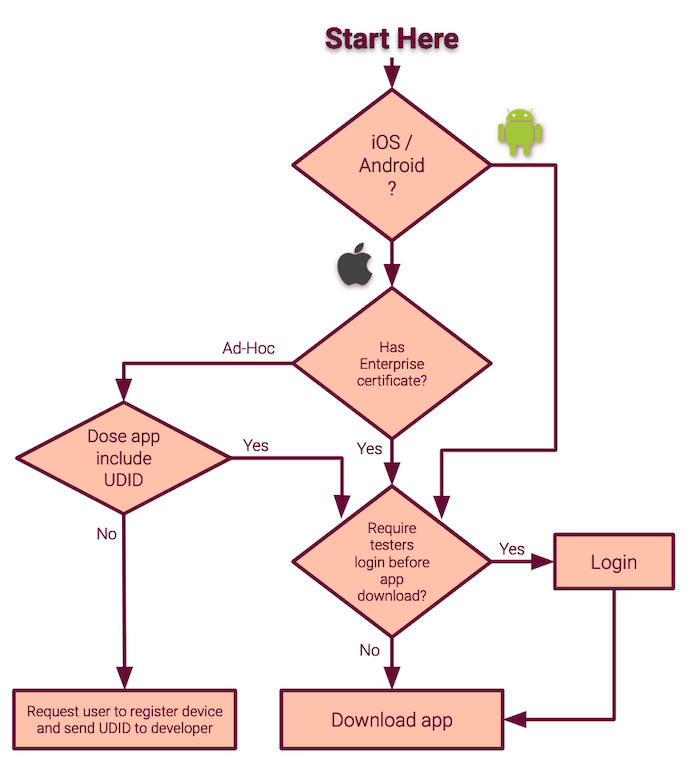
You'll need to decide whether testers should log in to their accounts before downloading or if anyone with the link can download the app.
The distribution process described above can be used for pre-registered testers or testers invited to specific builds.
Email Invitations
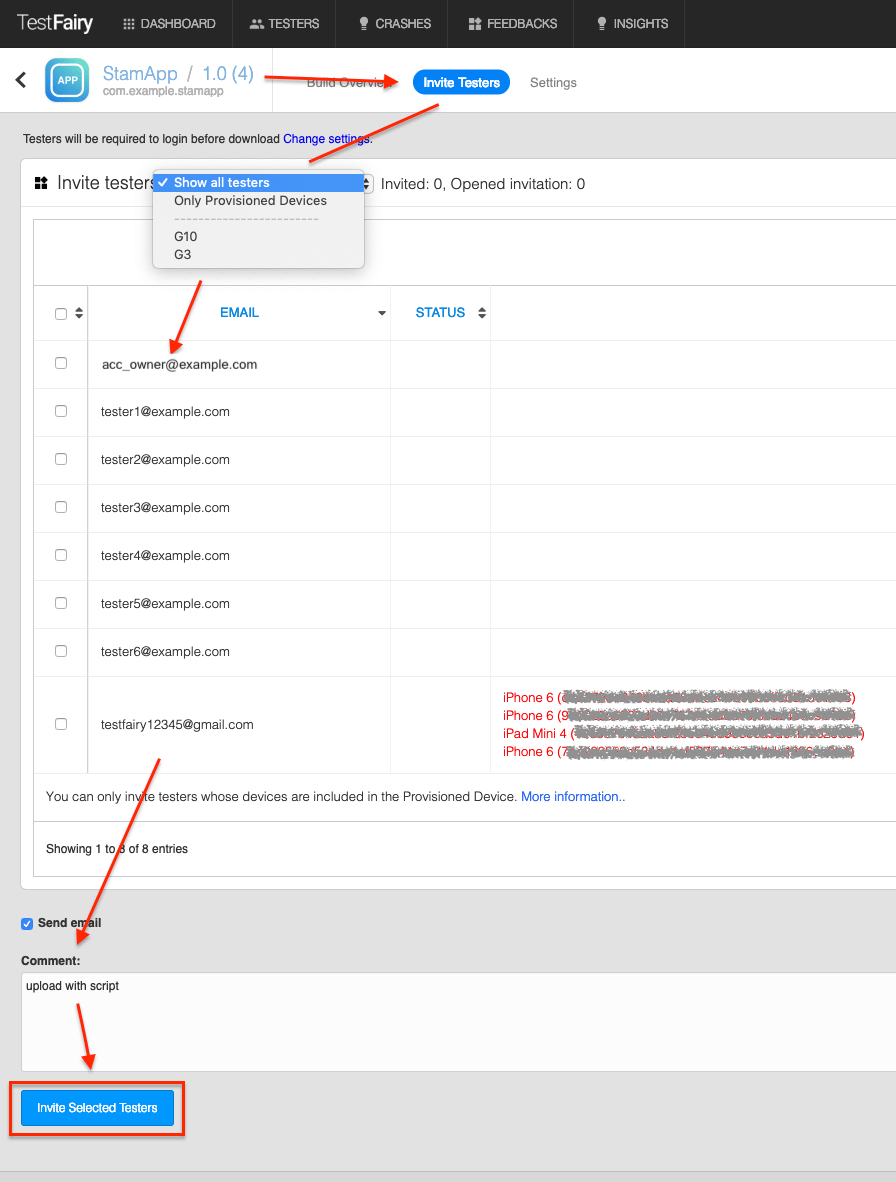
You can invite your testers via email either by pre-inviting them or by adding them to a build.
Pre-Invitation
To pre-invite testers, add them to the testers list on the TESTERS tab of the dashboard.
Pre-inviting is useful when distributing iOS applications to specific devices without an enterprise certificate. It is also commonly used for in-house testing teams.
Adding to a Specific Build
For adding a tester's email to a specific build, use the empty email box at the bottom of the testers list.
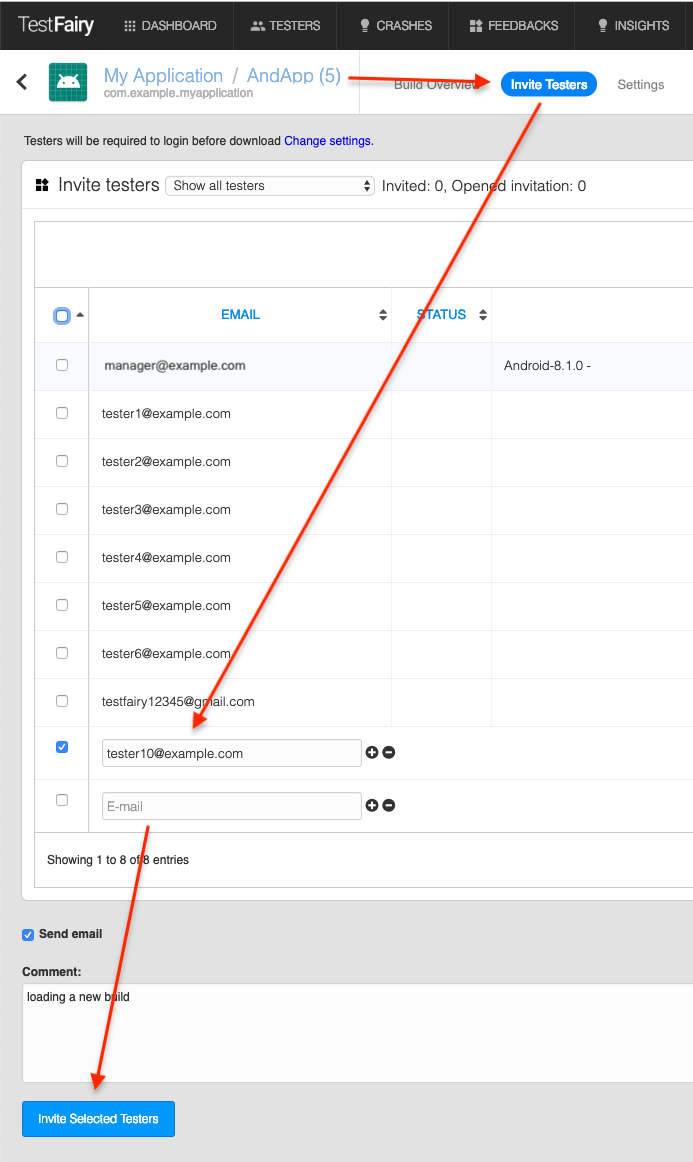
This action sends them an email with a download link. It can be done with Android and iOS apps signed with enterprise certificates. This method is also suitable for in-house testing teams that need access to multiple builds and applications.
Landing Pages
You can build a community of testers or distribute your app by utilizing a pre-designed landing page (see Landing Pages). Share the landing page link with testers to facilitate app downloads. The download link on the landing page can be secured through login, requiring testers to log in before downloading.
Testers Dashboard
The Testers Dashboard is where a tester can view the apps they were invited to test. While all testers have access to this view, developers can switch to the full dashboard view using the View as Developer menu option.
Permissions
Permissions manage app distribution to groups of testers/users and are defined for each app (including all its builds). This means all testers within a group can access all builds of the app.
Permissions are based on defined groups of testers (see Managing Testers).
Once groups are defined, they will appear on the Permissions page.
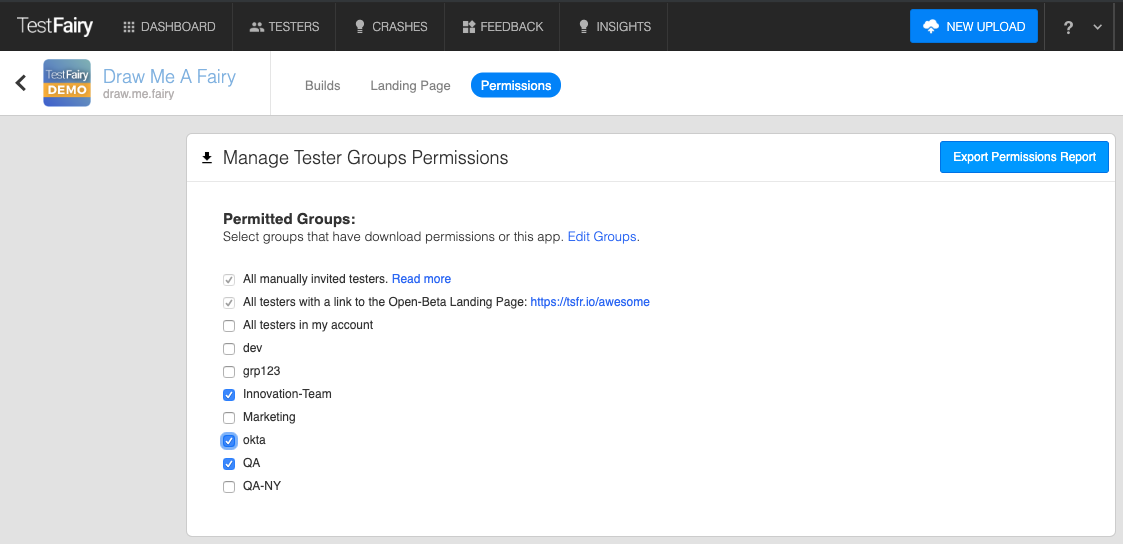
Selecting the checkbox of a group makes the app (and all its builds) available to that group (and its testers). The app will then be shown on the Testers Dashboard for download. Deselecting a group checkbox removes the app from the Testers Dashboard for testers in that group.
Stopping Distribution
To halt the distribution of an app, you have two options:
- Disable distribution
- Delete the build
Disabling Distribution
In build settings, switch Sauce Labs Mobile App Distribution to Disabled and then click Save Changes.
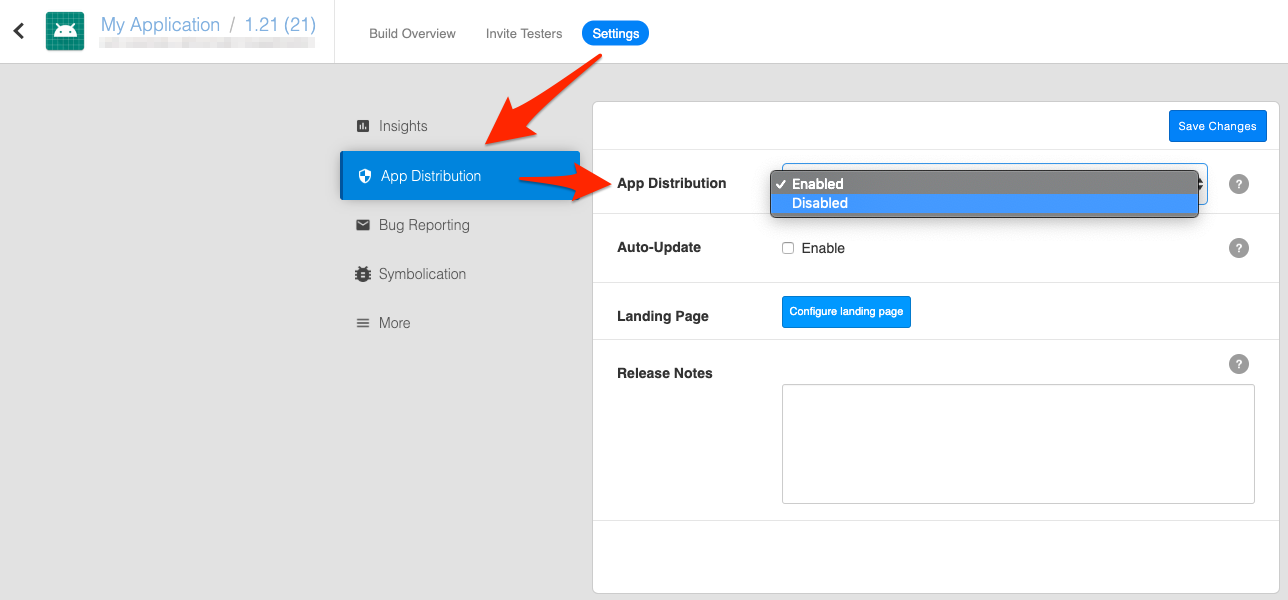
A confirmation message will indicate the settings have been updated.

On the build overview, you'll see a notification that the build has expired and testers won't be able to install it.

Once a build is disabled, the app will no longer appear on the testers' dashboard. However, testers who have already installed the app can continue using it.
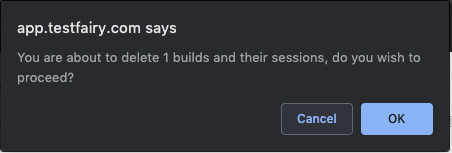
Deleting a Build from the Dashboard
To remove a build from the system, navigate to the App Overview menu.
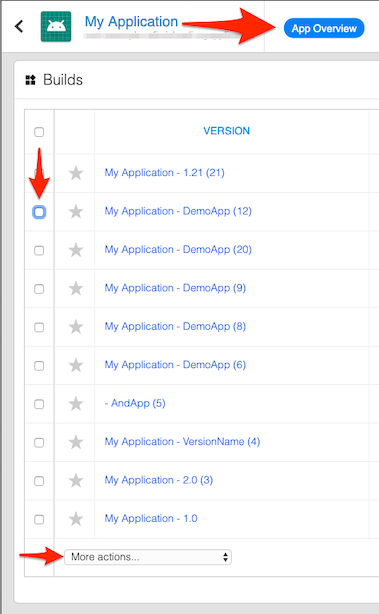
In the left column, select the checkbox of the build you want to delete. You can choose one, many, or all the builds.
After selecting the build(s), in the bottom actions dropdown list, click Delete (n) builds.
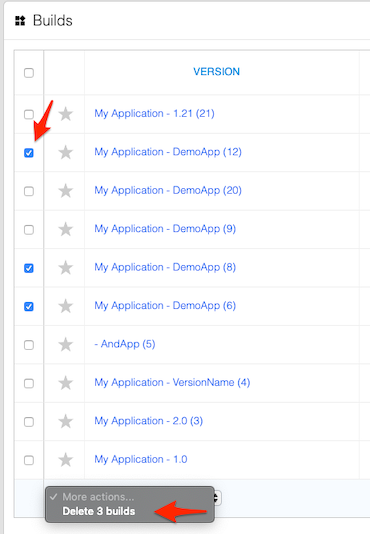
Confirm the deletion.